
Proof of concept

How I Built a Serverless Geo-Search App with DynamoDB
I’m writing a serverless app in my spare time. One of the features I wanted to incorporate was a user-scrollable map. The map would have pins on it showing specific points of interest as they related to my project.
I am building the application with a strict serverless setup. API Gateway, lambda, and DynamoDB. That’s really all it is. (Side note: That’s not really all it is. Take a look at my serverless cost model article for details.) I don’t use provisioned services because I want to keep costs down. Plus I want to make the app 100% serverless.
The hard part of building this map feature is the search. I have to search DynamoDB for all points of interest on the visible space on my map.
If there’s one thing Dynamo does well, it’s lookups. If there’s one thing that Dynamo does poorly, it’s searches.
The difference between a lookup and a search is simple:
- **Lookup **— “Give me this item. Here are the identifiers.”
- **Search **— “I want everything that matches this set of criteria.”
I had to build a search for items within a specific radius of a coordinate. Not the best use case for Dynamo.
So I went to the internet.
Open Source FTW
 Photo by Mathew Schwartz on Unsplash
It took all of two minutes of searching for me to stumble upon dynamodb-geo, a free, open-source, quasi-supported-by-AWS npm package that does geohashing and enabled me to perform my search query in Dynamo. I won’t go into details about how it works because the npm page does a pretty good job of that.
Armed with my open-source, Dynamo-searching npm package, I set to work getting my map implemented.
It didn’t take too long for me to stumble upon my next hurdle: geocoding.
Geocoding is taking a human-readable address and turning it into latitude and longitude.
Surprisingly, that functionality isn’t available in dynamodb-geo or built into some random JavaScript library. Back to the internet.
The obvious choice was Google Maps Geocoding API. Everybody knows and trusts Google Maps. But I wasn’t a huge fan of the pricing model or the heavy GCP configuration needed to get an API key. I wanted something that felt like it had a lower barrier to entry.
That’s when I stumbled upon Geocodio. It seemed like a small company with the right ideas and feature set to get me where I needed to go. So I generated a free API key and started converting addresses into coordinates.
Staying Strong With Serverless
The documentation for dynamodb-geo is good, but it left out some important details when you’re getting started in a serverless environment. For example, the package requires a Dynamo table to be set up in AWS with a specific primary key combo, plus it requires an LSI. I was forced to manually run some scripts and do some snooping around the console to figure out what was going on.
All my serverless side projects get thrown into a CloudFormation template. I do this so I can take my code to any account and any region, and it just works. After poking around the Dynamo console post-setup script, I was able to come back and add the details about the layout of the table and index in CloudFormation.
I built a quick way to add points of interest to the system through lambda. I set up an endpoint in API Gateway that accepts a name and street address, and routed to lambda with the details. The lambda uses Geocodio to get the coordinates from the address and adds the coordinates to Dynamo using dynamodb-geo.
Of course, I added the API and lambda function all in CloudFormation as well.
Navigating the Limitations
 Photo by Jeremy Bishop on Unsplash
The “what happens if I need to change the address of one of my points of interest” use case reared its ugly head quickly in my project. Well, dynamodb-geo doesn’t quite let you update addresses and coordinates. Since it uses the geohash of the coordinates as the partition key, you can’t just update an address.
You cannot update key values on a DynamoDB item. So I set to work making my update do a delete and re-add of the point. Only, that’s not super-easy to do because I didn’t have the geohashing algorithm. The partition key on the table is a geohash of the address. Without the algorithm, I couldn’t look up the item in order to delete it.
What I needed to do for a robust geo-searching solution was provide myself an easy look-up mechanism for updating and deleting a specific point.
The first thought that came to my head was pretty easy: Just assign a UUID to the point and add a metadata item to Dynamo. Boom. Piece of cake.
Except the pk in the table is a number and not a string. This one puzzled me for a bit. The table has a compound primary key made up of a number partition key and a string sort key. For looking up an item, I would need both. As an easy solution, I generated a UUID for the sort key and stripped out all the letters for the partition key. Works for me.
Tie It All Together
Now that I had a strategy in place for adding new points and managing existing ones, I needed to finish my CRUD operations.
I built an endpoint for create, update, and deleting points, but I left the read as the geo-search. Using Geocodio to turn my street addresses into coordinates and dynamodb-geo to save and search across the coordinates, I was able to have a fully searchable map — all serverless!
I am so happy with the outcome of the search that I rushed over to Medium to explain and share it with all of you. If you want to get a copy of my proof of concept, you can check it out on my Github page.
Make It Your Own
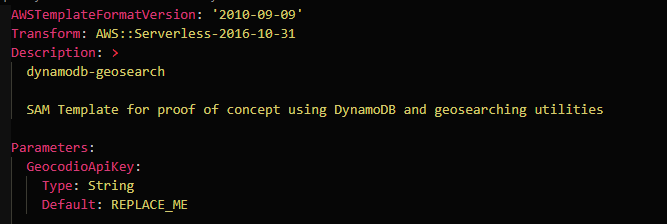
If you have the AWS CLI already installed on your machine, then you only need to do two steps to get this solution up and running. Go get an API key at Geocodio and replace the default parameter value in the template.yaml.
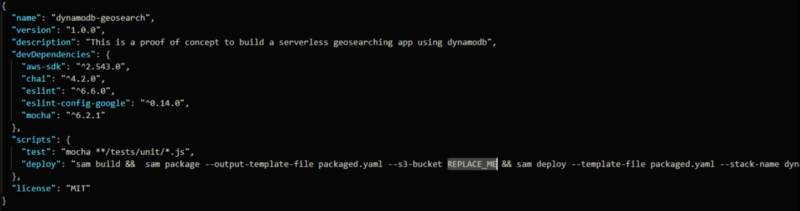
The other part you will have to change is in the package.json in the root directory. I have a script in there that will build and deploy the code to the default AWS account on your machine. All you need to do is provide it with the name of an S3 bucket for it to upload your artifacts to.
After you replace those two values, you should be able to just run
npm run deploy
in your root directory and have it deployed into AWS for you.
Have fun with it and good luck building!


Share on:
Join the Ready, Set, Cloud Picks of the Week
Thank you for subscribing! Check your inbox to confirm.
View past issues. | Read the latest posts.